Getting started with Keyman for macOS
Follow these steps for a basic introduction to Keyman for macOS:
Note: Keyman for macOS must be installed first. For help on installing Keyman for macOS, please see: Install Keyman for macOS.
Step 1: Is Keyman active?

Check the menu bar near the date and time to see if Keyman for macOS is
active. If it is active you will see the Keyman icon: ![]()
- If the Keyman icon is in the menu bar near the date/time, continue on to Step 4.
Step 2: Choose Keyman from Input Menu
If the Keyman icon is not in the menu bar, choose Keyman from the Input menu in the menu bar and continue on to Step 4.
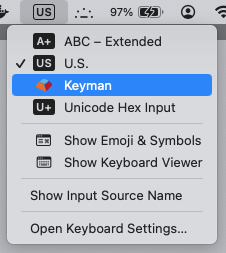
The Input menu appears in the menu bar only if you enable 'Show Input menu in menu bar' under Keyboard settings > Input Sources > Edit. The Input source currently in use is represented in the menu bar by an icon or a symbol containing one or more characters.
If Keyman is not listed in the Input menu, then Keyman for macOS has not been added as an input source. Follow Step 3 to add Keyman for macOS as an input source.
Step 3: Add Keyman for macOS
To add Keyman for macOS as an input source:
-
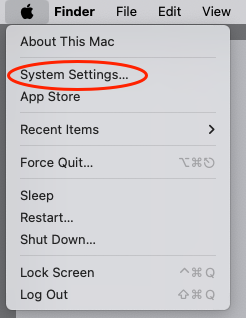
On the Apple menu, click System Settings
-
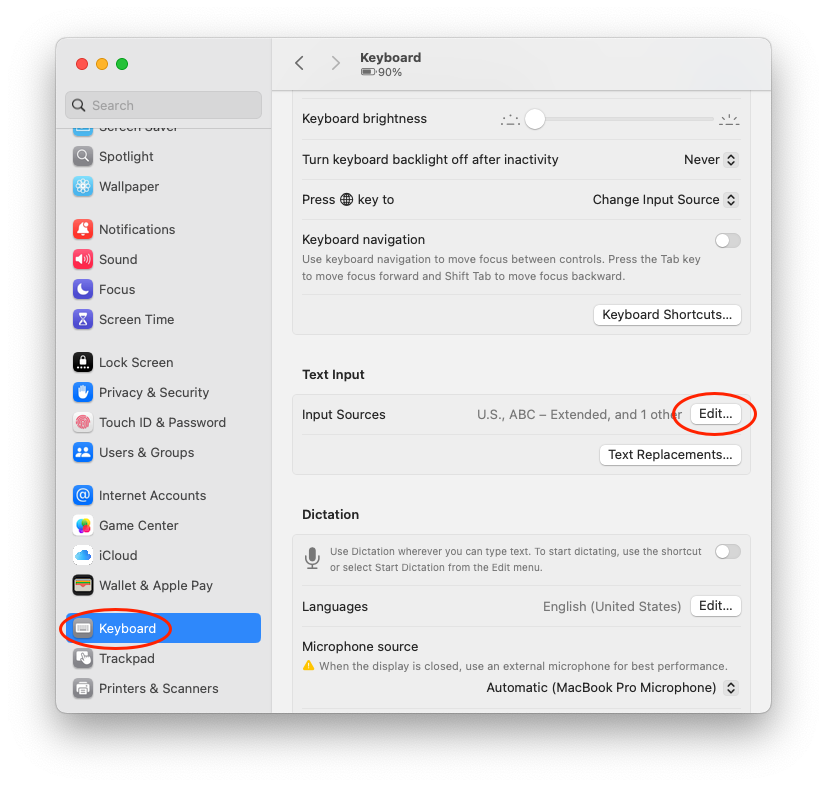
Click Keyboard, go to the Text Input section and then click the Edit... button
-
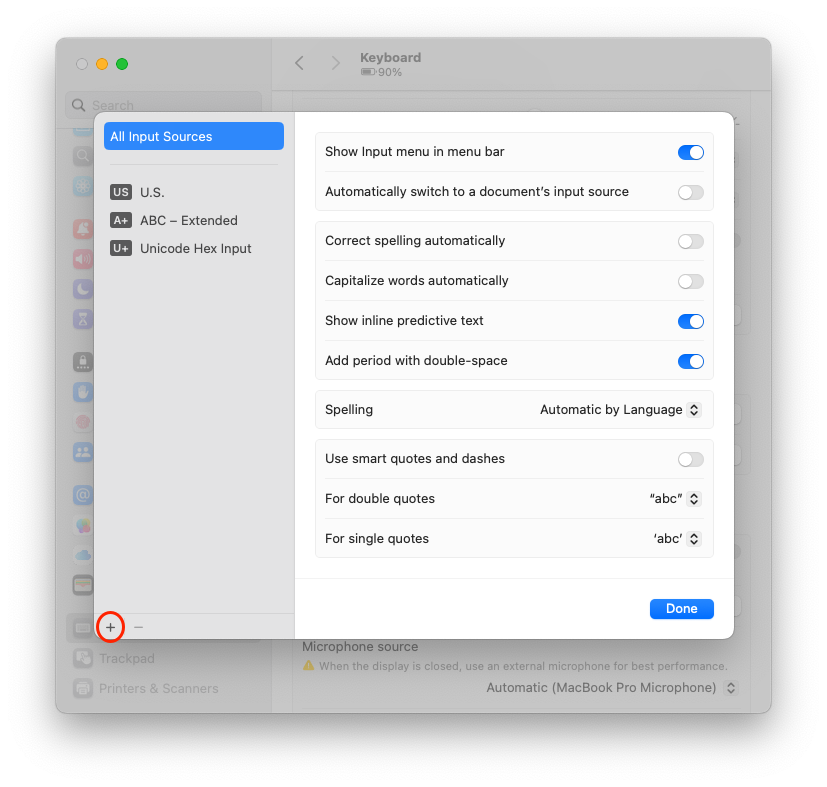
In the Input Sources window, click the plus sign to add a keyboard
-
In the left-hand pane, select Multiple Languages, and then select Keyman in the right-hand pane and click the Add button.
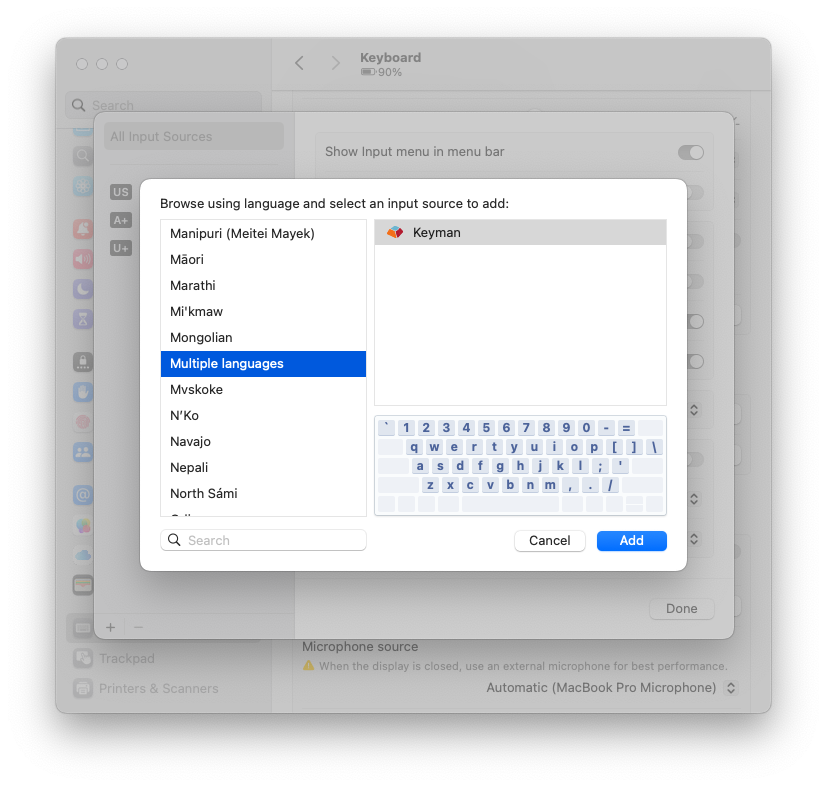
Now, return to Step 2.
Step 4: Select a Keyman keyboard
With Keyman selected in the Input menu, select a Keyman keyboard.
Note: If the Keyman menu items are not available, please restart the computer.
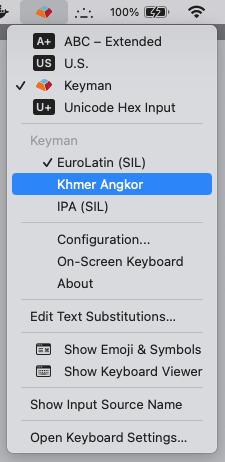
Tip:: If there are no Keyman keyboards in the Keyboards menu, you can learn how to install one here: Install a keyboard.
Step 5: Enable the On-Screen Keyboard
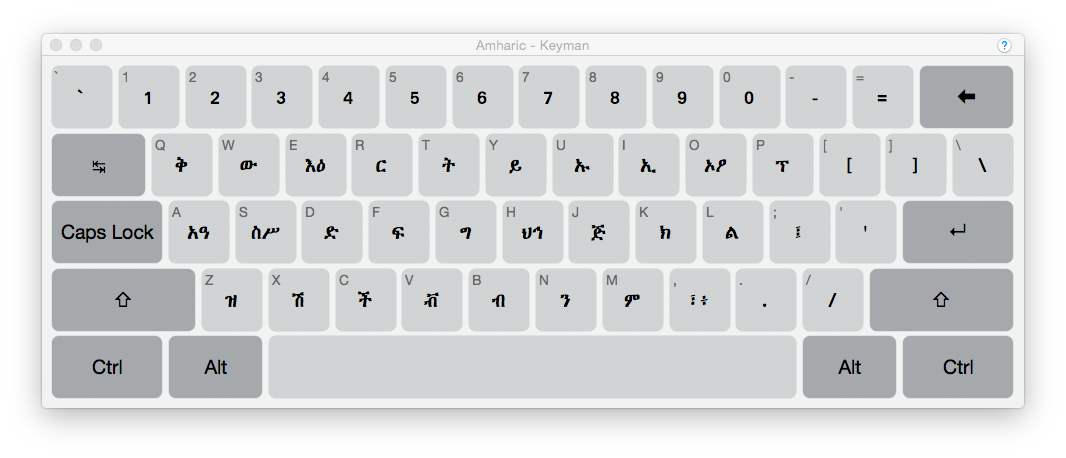
To become familiar with the layout of a Keyman keyboard, use the On-Screen Keyboard tool: On the Input menu, point to Keyman, and then click On-Screen Keyboard.
Tip:: You do not need to use the On-Screen Keyboard in order to type. You can turn it off at any time.
Tip:: Some Keyman keyboards do not include an On-Screen Keyboard. You will see a standard US keyboard layout if the selected keyboard does not include an On-Screen Keyboard.
Step 6: Start typing!
You can now start typing in your language in almost any application. Use your hardware keyboard or click the keys in the On-Screen Keyboard to type.
Note: To return to using your normal keyboard, choose your default keyboard from the Input menu in the menu bar.


